Ads 468x60px

Showing posts with label Unit Studies. Show all posts

Jan 22, 2013

Water Cycle: Oceans

POST LAB
OBJECTIVES:
  • Exploring how the oceans became salty.
  • Discovering the components of salt water.
VOCABULARY:
  • elements
  • erosion
  • evaporation
  • oceans
  • salt 
(I highly recommend using a children's dictionary to go over vocabulary words so they clearly understand each word)
MATERIALS:

Jan 20, 2013

Water Cycle: Oceans

Dissolving Salt in Water
OBJECTIVES:
  • Dissolving salt in water.
  • Observing how salt crystals form.
VOCABULARY:
  • evaporation
  • salt
MATERIALS:
  • salt 
  • Epsom salt
  • trays
  • warm water
  • pan
  • rope-like string (mop string) 
  • measuring beakers
  • two jars or beakers. 
Students experiment with salt crystals.

Water Cycle: Oceans; Making Salt Water

OBJECTIVES:
  • Comparing fresh and salt water.
  • Discovering bodies of fresh and salt water.
VOCABULARY:
  • fresh water
  • ocean water
MATERIALS:
Students use a worksheet to compare fresh water with salt water.

Jan 16, 2013

The Water Cycle: Discovering How Water is Used by Humans

OBJECTIVES:
  • Exploring components of water.
  • Discovering how water is used by humans.
VOCABULARY:
  • hydrogen
  • oxygen
  • water
MATERIALS:
 
Students use a worksheet to learn about ways to  clean water.
Before you begin a little review might need to take place to refresh the vocab words and the water cycle.

Jan 15, 2013

The Water Cycle: Experiencing Surface Tension

OBJECTIVES:
  • Discovering properties of water. 
  • Experiencing surface tension.
VOCABULARY:
  • flow
  • fluid
  • surface tension
  • water
MATERIALS:
Students experiment with water to discover properties.
 
BACKGROUND: Water remains a liquid over a very wide temperature range, namely, a range of 0°C to 100?C,  between freezing and vaporization.   This spans the temperatures of most parts of the Earth where life can occur.

Water has a very high specific heat, which means that it can absorb or lose much heat before its temperature changes. It takes a lot of energy to start evaporation because water has a high latent heat of vaporization.  For this reason, water evaporates slowly from ponds and lakes, where many life forms are dependent on it.

Water is less dense in its solid state than in its liquid state, so that ice floats instead  of sinking.  This property permits life to develop in polar regions and subpolar regions where ice floats and allows life to continue living below the surface.  If ice were heavier than water, it would sink, and more ice would form on top of it.  As a result, all life in the waters would be trapped in the ice in the many areas of the world where it gets cold enough to freeze water.
Water's surface tension (the ability of a substance to stick to itself) makes it an excellent substance to float heavy objects upon.  Water not only sticks to itself, but also to other surfaces, and this allows it to move against gravity, which is very important to plants when transporting water form the soil to their leaves.  This upward motion is known as capillarity or capillary movement.
PROCEDURE: This exercise consists of two parts.  First, the students will discover how  water flows and secondly, the students will discover how many drops of water they can put on a penny.
  1. In the first exercise give each child two cups.  Have them measure 1 cup of water into one cup.
    Let them hold both cups and ask them the following questions:
    Which cup contains a fluid?
    Which cup contains melted ice?
    Which cup contains air?
    What is the fluid?
     
  2. Next ask the students to pour the liquid.  Ask them to describe the liquid.  The water is flowing; it is a fluid called water.
      
  3. In the second exercise give each student an eyedropper and penny.  First discuss surface tension by using the following illustrations. Surface tension is what allows  a water strider (insect) on water not to sink and explains why heavier items in water, float.  In this exercise the students will experience surface tension by seeing how many drops of water  they can put on a penny with an eyedropper.  Ask students to predict how many drops can fit on a penny.   You are going to have to illustrate and demonstrate very carefully how to use an eyedropper.
      
  4. Using an eyedropper, gently let water drops fall into the center of the penny.  Count how many you can put on before the water runs off.  (It will be between 20 and 34.)  Let the children try this.  Their numbers will be lower than yours, and will change depending on whether they are letting the drops fall into the center of the penny or on the edge.
      
  5. You may want to extend this lab by seeing how many drops they can place on a nickel.  Go over their results.  You may also want to repeat the experiment with alcohol.  It has a much lower surface tension and will not be able to hold as much liquid.
      
  6. The key concept here is to have the students experience surface tension and to be able to observe surface tension when they leave the classroom.  
After we finished graphing the amount of drops the penny could hold we tried the experiment on a nickel and quarter. But before we tested out the experiment I had my boys guess how many drops each would hold and record their guess in their science lab journals. Each was surprised by how many drops the quarter and nickels held but also thought it was fun to see the end results. 

This is really simple lab to show surface tension and can be found at msnucleus.org. Under elementary/water cycle/first grade/experiencing surface tension. Make science a fun part of homeschooling!

Jenna

Jan 14, 2013

The Water Cycle: The Properties of Water

When the word 'SCIENCE' is mentioned in my house all the little ears perk up just as if I said the word 'cookies.' For our third unit (weeks 18-21) of First Grade Science we will be studying the Water Cycle. Its a four week unit consisting in studies of The Properties of Water (week1), Making Salt Water (week 2) Movement of Air (week 3), Reading A Thermometer (week 4). Each week is broken into three parts: a pre-lab, lab, post-lab.
from msnucleus.org
Today's post is just about week 1: The Properties of Water Pre-Lab

Objectives:
  • Investigating the water cycle 
  • Exploring water's three states of matter
Vocabulary
  • evaporation
  • gas
  • liquid
  • precipitation
  • solid
  • water cycle   
Materials:
The hydrologic or water cycle is a major driving force on Earth. Water is important to our everyday lives. First grades see water all around them, but many do not realize its importance. Ask students if we can survive without food or water longer. They are usually amazed that humans can survive without food much longer than water. Humans can only last about three days without water. At that time our kidneys will no longer function, and we will not be able to get rid of the wastes that accumulate in our bodies. Our bodies require fresh clean water to survive. Polluted or salty water will not help our bodies-God made us this way!

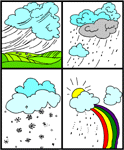
Water circulates in the atmosphere through the water cycle. The water on Earth evaporates (or becomes gas) into a cloud. When the conditions are right, the cloud releases water or precipitation.

Procedure:
1. Discuss the different components of the water cycle by having students sing-along to Drippy the Hippie.   
Ok I know, I know this is really chessy, but who cares if your kids learn something and it does not 
disagree from Biblical teaching, even if it's granola ;)

2. Make copies of the worksheets for your students. Color the worksheet and cut out the pieces. 
   
 3. Have students use the pieces they cut out to make the water cycle. Then go over the components of the water cycle with the students slowly. Evaporation from water forms clouds and then precipitates.

Review by asking a few questions:
  • What is evaporation?
  • Is evaporation a gas? 
  • Name a form of precipitation? hail, snow, rain, or sleet
  • Can we drink water from water puddles in the street? Why not?
  • Is water that falls from the sky clean?   
  • Explain the water cycle to me.
All of this and more units can be found at msnucleus.orghttp://www.msnucleus.org/membership/index.html

Follow along for tomorrow's post on the lab on Water Cycle!
 Jenna   

Dec 6, 2012

Egypt Unit Study Day 4 & 5


Day 4: Egyptian Geography
·         
      Use atlas and globe to locate Africa and Egypt. Discuss what type of landscape is there ie desert, oasis, delta, palm trees, etc.
·         
       Lap Book: Word Scramble; cut out the letters to the words: delta, oasis, tomb, desert, pyramid, and sun. Paperclip the letters together and store in pocket. Have student pull out letters and work on one word at a time, give hints if needed.

Nov 29, 2012

Outdoor Education for Homeschoolers!


Hey Cleveland Homeschoolers! Join us for:

"Outdoor Education for Homeschoolers: Night Sky"
Fri, November 30, 6pm – 8pm
North Chagrin Nature Center

Join Naturalist Angelec Hillsman as we gaze at the night sky. Discover the wonders of the fall night sky through star watching, storytelling and SkyLab, an indoor planetarium. We’ll also make a craft, walk under the beaver moon and more.
Ages: 6 – 12 years
Fee: $3
Terrain: easy, level, 1 mile

Registration is required. Register by calling 440-473-3370.


Love to See You There!!!

Jenna

Oct 31, 2012

Fire Unit Day 3: Fireman Hats

Every so often I get really courageous and try to come up with my own craft-sometimes it works out other times, um not so much. This one worked, well sorta. Maybe if my kids had tiny heads, haha.

Supplies:
  • cardboard (we used a diaper box)
  • Tacky glue
  • Red tissue paper
  • Recycled Cool Whip container or any kind of bowl
  • Red, Yellow and Black construction paper
  • Scissors
  • black marker
  • Pentagon shape from a puzzle or just draw one
  • Imagination!
Start by cutting out one side of your cardboard box then use the outside edge of your Cool Whip container to draw rounded edges on all four sides of the cardboard. Cut the rounded corners.

Use the top of the container to trace a large circle in the center. Then cut out the circle.

After cutting the edges and center circle this is what you should end up with.
Use the piece of cardboard as a stencil and trace the design on the red and black construction paper. Then cut out the design on the paper and glue to the top and bottom of the cardboard stencil.

Place on top of black paper then trace. Repeat with red paper. Then have student cut out the tracings.


Glue the red to the top and black to the bottom.
Use the bottom of cool whip container to trace a circle on another piece of cardboard then cut out the circle. Set the circle aside for later.

Take the red tissue paper and set the cool whip container on top. Glue around inner base and fold in the tissue paper around the container. Add more glue on the overlapping tissue paper.
Hint: I doubled up the tissue paper to make it darker.
Take the small circular piece of cardboard add glue and press down inside the cool whip container to hold down the tissue paper.


Use a pentagon shape from a puzzle to trace out the badge, cut it out then write a FD (fire department) in bold black letters. Glue to the front of the tissue covered cool whip container or top of the hat.


Push the cool whip top of the hat through the hole of the brim. Then try it on!
As stated before, should've used a larger rimmed bowl. Next time, live and learn.
The Little Engineer got a kick out of his fireman hat.
Then we read the story~
Stay tuned for a post on Fire Unit day 4 Lab!
Jenna

Oct 27, 2012

Egypt Unit Study and Lapbook Day 3


Day 3: Pyramids
·     Build a pyramid out of sugar cubes (student can build whichever type they desire )

      Lap Book: Learn about the 4 Types of Pyramids, do activity (write in the names of the 4 types on the line then glue to lap book)

      Lap Book: Puzzle: color, laminate and cut puzzle then paper clip together so the pieces don’t get mixed up with other puzzle pieces, store in pocket.


Oct 24, 2012

Fire Unit and Lapbook Day 2

For day two of our Safety Unit via Fire/firefighters we did a few more activities in the lapbook and binder of free activities from Homeschool Creations Printables then tried a new cute craft from Tippytoe Crafts.

Supplies:
  • White, red and brown or peach construction paper
  • Finger paint
  • Hole puncher
  • markers
  • Glitter glue
  • Glue stick
*Tip: Teacher make the craft first to give your kids an example to go by, as you can see from the above picture my hand barely fit on the paper.

Egypt Unit Study and Lapbook Day 2

Welcome to Day 2 of our Egypt Study: Mummies!

My First Lapbook (a project in the process for future years).

 Day 2: Mummies

We started with a few lapbook activities including cutting out and coloring a mummy fold-out. The mummy fold out shows how a wealthy Pharaoh would be buried with multiple layers of fancy wrapping.
Junior working diligently on his Lapbook
Related Posts Plugin for WordPress, Blogger...

Popular Posts


A Mother's Prayer

Lord bless my home and anyone who enters. Lead me daily so that I am always aware of You! Whether educating my kids, cooking or cleaning may my attitude always be that of a servant. Give me the words to guide my children to You, to know You, Your character and love You, Lord. Please teach to have patience and to always be learning. Lord mold me through each stage of life so I am continually growing and pursuing You no matter what. Lord I want to be a great mom and wife and I know that if I look only to You for help that I can accomplish this, the love for my family that I desire to show them. Lord I'm amazed by You and I love You. Amen.

Full of Life, Full of Love

"The spirited child-often called "difficult" or "strong-willed"--possesses traits we value in adults yet find challenging in children. Research shows that spirited kids are wired to be "more"-by temperament, they are more intense, sensitive, perceptive, persistent, and uncomfortable with change than the average child." It seems as though we have three, and they are very much like me. What does this mean? I need to be compassionate, consistent, confident, controlled, all with a gentle yet firm approach. Yes my plate is full.

Motherhood: A rigorous training ground

What an awesome responsibility mothers have to their children. Cultural stereotypes promote the idea that giving birth miraculously endows women with kindness, compassion, and goodness. But we all know better. Many of us can witness that we are made more aware of our weaknesses and impatience after becoming mothers than we were before. Godliness and generosity are not prerequisites of giving birth; they are characteristics that God hones and whittles into our character over time. Motherhood provides a rigorous training ground where we can display practice and model the disciplines of love, honesty, and compassion before our children. --Rebecca Laird